There is a question that comes up every time I build or realign a microscope: how do you make sure every optical element sits on the same axis, at the same height, and in the same lateral position — mirror after mirror, lens after lens? It sounds trivial until you’re standing at the table with a dozen components and no fixed thing to line them up to.
The tool I reach for to answer it costs less than a hundred euros, and you can buy it in any hardware store. It’s a 3-axis laser level — the kind sold for hanging shelves straight. It has probably saved me more hours than any piece of optics-grade equipment I own.
The problem: what do you actually align to?
For laser-based setups, diaphragms and irises are the standard alignment aid. You place two of them along the intended path, walk the beam until it passes cleanly through both, and you know your beam is straight between those two points. That works well — but it only checks alignment point by point. It confirms whether a beam goes through where you’ve decided the path should be.
What it doesn’t give you is something to build against. The diaphragms tell you if the beam is where you put the diaphragms; they don’t tell you where the axis should live in the first place. When you’re assembling a system from scratch, or when there’s no beam yet because the source isn’t the first thing you mount, you need a reference that exists independently of the optics you’re placing.
That reference is the missing piece. Without it, alignment becomes a chain of relative adjustments, each one inheriting the small errors of the last. With it, every element gets positioned against the same ground truth.
The answer: an external reference
The fix is to introduce an external reference — a straight line in space that doesn’t depend on any of your optics being correct yet. Everything you mount then gets aligned to that line rather than to the previous component.
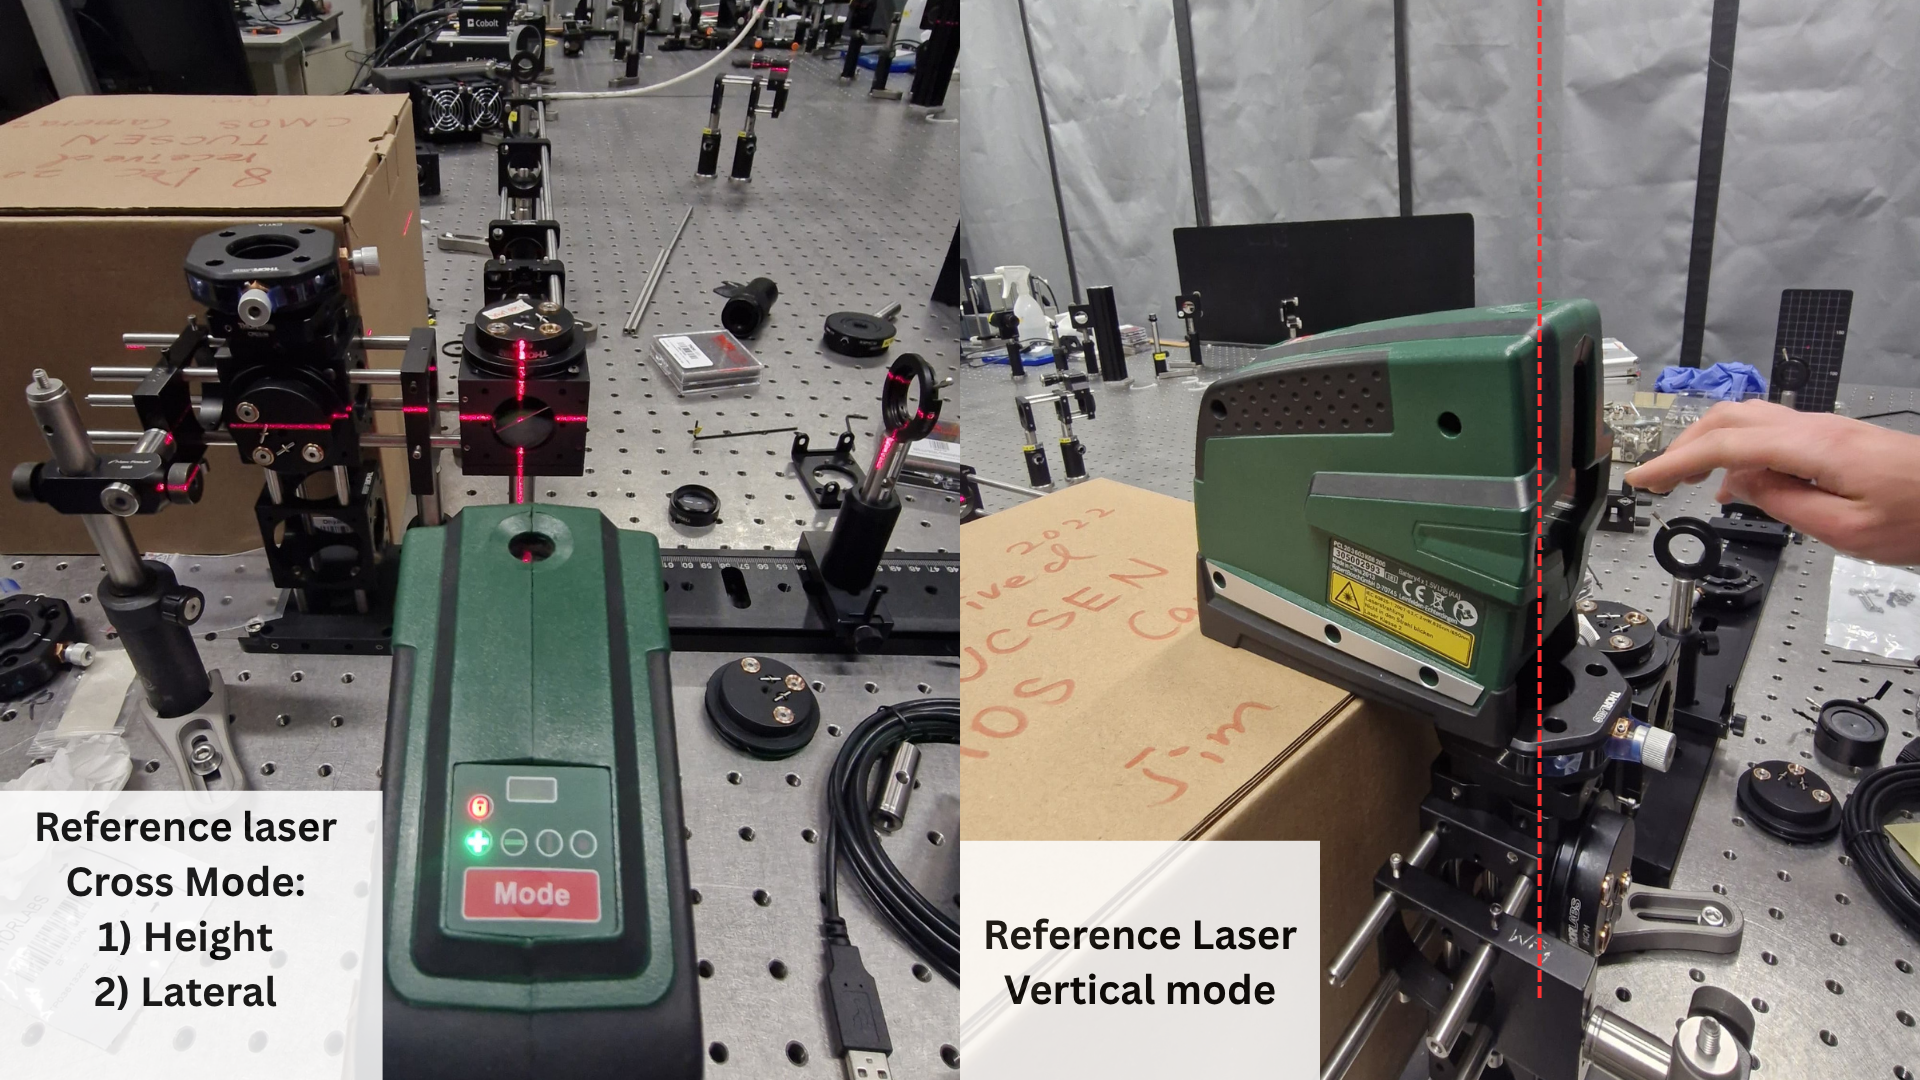
This is where the hardware-store laser level earns its place on the optical table. I use a Bosch Universal Level 2, but the specific model matters far less than the principle. Mounted on a self-levelling pendulum, it projects straight reference lines in all three directions. Crucially, the lines stay true even when the tool itself isn’t perfectly level — the pendulum compensates within its range. On a crowded table where a level surface is never guaranteed, that self-correction is what makes it usable.
What the laser level gives you
- Height and lateral reference lines to position optics against, independent of the beam path.
- A true vertical — the line I use most, for setting objectives and defining the optical axis.
- A reference that lasts the whole build, not just one component or one step.
How I use it in practice
The vertical line does most of the work. It’s a genuine reference for positioning objectives and for defining the optical axis of the whole system. Once that vertical is established, I have a fixed thing to relate every other element to — height, lateral position, and axis all follow from it.
The horizontal lines matter too, mostly for keeping components at a consistent height across the table. But it’s the vertical that changes how the build feels: instead of nudging each part relative to its neighbour, I’m placing each part against a line that never moves.
Mark on the ceiling exactly where the vertical line lands, directly above the objective. That mark becomes a permanent reference — you can recover the same axis for future alignments without ever setting the laser up again.
That ceiling mark is a small trick with a large payoff. Alignment work is rarely done once; setups drift, components get swapped, and you come back to the same system months later. A permanent overhead reference means you don’t have to reconstruct your axis from scratch every time.
Building outward from the objective
Having a reliable external reference has changed the order in which I build. I now often work backwards: start at the objective mount, establish a perfect vertical there, and then align every other optical element outward along that line. The objective — arguably the most sensitive part of the system — anchors the geometry, and everything downstream inherits a clean axis instead of accumulating error toward it.
It’s a small shift in method, but it turns alignment from a sequential guessing game into something closer to construction against a plan. You’re not hoping the chain stays straight; you’re referencing a fixed line at every step.
Why the cheap tool wins
None of this replaces careful, beam-based fine alignment. Diaphragms, autocollimators, and proper optomechanics all still matter for the final touches. But the laser level solves the harder problem first: giving you something fixed and trustworthy to build against before any of that fine work begins.
That’s the lesson I keep relearning on the optical table. The most valuable tool isn’t always the most precise or the most expensive one — sometimes it’s the one that removes the ambiguity everything else depends on. A shelf-hanging laser level does exactly that, and it costs almost nothing.
If you build or align your own setups, I’d be curious what simple, off-the-shelf tools have quietly become indispensable in your lab.